This article is about how to configure GIT to be able to upload all the changes you make to your web application files from your localhost to your production server.
Deploy the web application.
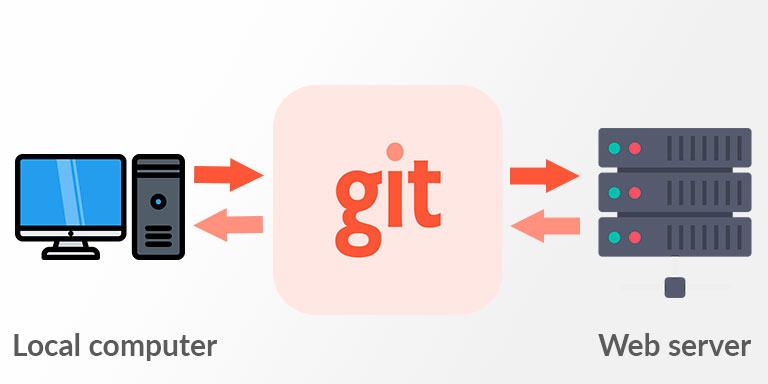
The term deploy refers to the process of moving an application from development to production and making it accessible to users. Once we have created a web page, and we have tested that it works correctly, we have to upload it to the server, this task was normally done through FTP, but with the GIT change manager we can automate this task. Thus from the command line of our computer we can upload all the changes that have been made in an application automatically.
Prepare the repository on the server.
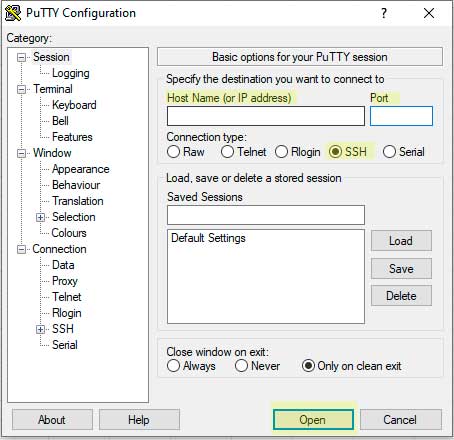
To create the GIT repository on our server we must have shell access to it, that means access to the command line. For this we will use an SSH access program, if you use windows the most common is PuTTy and in linux the ssh command, but you can use the SSH access program that suits you best. We must enter the IP address and the open connection port, by default 22.
Once connected to the machine we must enter the username and password. This will allow us to directly access the home folder of the user you have used.
Create a Bare repository
The idea is to have a bare-type GIT repository, these repositories do not allow having branches and the files in the Master branch are always updated.
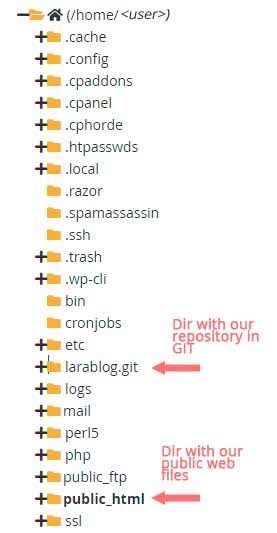
We want to have the GIT folders outside the public folder of our website, so in the user’s home folder we will create the repository in a folder identified with the suffix .git
$ git init –-bare <web_name.git>
This GIT command will inform us that a new repository has been created in the folder name_of_the_web.git. We access this folder:
$ cd name_of_the_web.git
Create the GIT hook
 Now we are going to create a file inside this GIT folder to inform what will be the directory where the files of our website are located. Every time we perform operations on this repository, it will modify the files in our website folder.
$ nano hooks/post-receive
Once inside the nano editor we must add the following lines of code:
#!/bin/sh

GIT_WORK_TREE=/home/<username>/<folder_containing_the_web> git checkout -f
To exit and save the changes in nano, press Crtl + q
The newly created file will have the default permissions of linux 644 and we must change them to 755
$ chmod + x hooks/post-receive
We already have everything on the server ready to upload our website, a folder on the home page with the GIT repository and a folder, normally, inside public_html that will contain our website, empty for now because we have not synchronized yet.
Synchronize our GIT from localhost
In our computer, we open a terminal in the folder that has our web application, and which we are controlling through GIT.
Add remote to GIT
We must add a remote source of data to our local repository, from this remote source we can perform the push, pull or fetch of our repository.
git remote add <Descriptivename> ssh://<username> @ <domain_name>/home/<web_name.git>
Where <Descriptivename> can be anything to identify that origin, for example deploy and <web_name.git> is the folder where we created the repository.
Now we can upload our website to the server with the command
git push <DescriptiveName> master
Now we can verify that the directory that contains our public website on the server has been updated with the files from our local computer